AHAK9WB6EE4K
I've been working as a Professional Custom Framer for over a year now. Seeing so much variety of pictures and items come through, I've started to experiment with different things you can do with framing.
Here is a shadowbox I made using parts of my own artwork:
I used an intaglio print I had made and cut out pieces of it. I used a sheet of hand-painted paper to line the back and sides and I used plastic spacers and wire to float the tree and form the branches, and pieces of foam board to lift the birds.
I didn't use glass, instead I used plexi, and carved an image into it, and used it as glass for the frame.
There's a ton you can do with a simple frame, try some new things out! :)
Monday, June 6, 2011
Wednesday, June 1, 2011
Japanese Stab Binding Tutorial
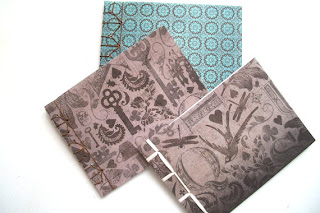
In my last post, I posted pictures of a few Japanese stab-bound books I had made.
Since a few people were curious how to do them, I thought I'd post up a little tutorial for you guys :)
There are many different ways to do a stab-bind. Since they are soft-cover you basically always use a heavy-weight paper, similar to card weight. You can either use the paper as is, and cut to size, or you can double them up, or use a full sheet to wrap entirely around your pages.
There are also many different patterns to use in your binding, I will explain how to do the basic traditional method, If you want to learn more and liked this tutorial, post a comment and let me know if you want me to post the other styles, I'd be more than happy to. :)
What you need:
20-50 sheets of paper (cut to same size, cut to the size you want the book to be)
Heavy weight paper (2 sheets) for front and back covers
Pencil, ruler, and scissors
Leather hole punch or thick nail with a mallet or hammer
Thread (linen thread, yarn. ribbon, embroidery thread, whichever material you prefer for the spine
Yarn darning or tapestry needle
Directions:
1. Choose your cover option and the paper for the text pages, decide the size of your book and the number of pages. cut all text pages to size, or start with paper
cut to a standard size. Then cut two pieces of scrap paper to the same size as the text pages, reserving one for a template and the other to place underneath
the text pages to protect them during handling.
2. Using your ruler and pencil, measure 1/2" (12 mm) from
the left side of the template and draw a straight line. Measure 1/2"
(12 mm) down from the head and 1/2" (12 mm) up from the tail, and
mark these points on the line. These will be the lowest and highest
sewing holes.
Measure the distance between these marks along the line. Divide that distance into equal parts and mark two other points along the line. These four marks on the
template show where to punch holes. Four-hole binding is traditional, though five or
more holes may be used.
3. Line up the text pages, and place them on thick cardboard or a wood board, not on a self-sealing cutting mat, which would become permanently damaged. Put the template on top of the text pages. Punch the holes with the leather hole punch or nail and a small hammer.
With the leather hole punch, punch only twenty pages at a time. If you punch more, the pages-and the holes-will slip out of alignment. Use the template to mark the position of the holes for each lot of twenty pages. Check that each hole goes through all the pages
4. Cut the cover paper to the same size as your text pages. Using the template, punch holes in the covers. Assemble the text pages, and put the covers in position.
To bind:
5. 1 Cut a length of thread or ribbon four times the height of the binding, and thread the needle. Hold the covers and the text pages together, and enter the lowest hole on the front cover, going through to the back. Pull the needle and thread through, leaving 2" (50 mm) of thread at the tail of the book. Thread around the tail, and through the same hole from the front cover. Thread around the spine and through the same hole again, coming out the back. Enter the next hole up from the back, and come out the front of the book.
6. Thread around the spine, and enter the same hole again from the back, coming out the front. Enter the next hole from front to back. Thread around the spine, and enter the same hole again from front to back. Go up to the next, or top, hole, and enter from back to front.
7. Thread around the spine and enter the same hole from the back, coming out the front. Thread around the head, and enter the same hole from the back. Your needle should be on the front, having just come out of the top hole. Go into the second hole down from front to back. On the back, go into the third hole down from back to front.
8. Move to the lowest hole, and remove the needle. Tie a square knot directly over the hole, leaving the tail of the thread. Cut the threads 1/4" (6 mm) away from the knot. Use the needle to tuck the ends into the hole.
Subscribe to:
Posts (Atom)


